Prerequisites: Familiarity with bash, linux file permissions.
Why Develop on the Cloud?
My Macbook Pro is now 4 years old and with only 8GB of ram it is beginning to show it's age in some of my larger data science projects. Being an Apple laptop, there is no way of increasing memory. Given that my laptop still works fine, and inspired by this blog post, I decided to move my development environment to the cloud. Specifically I decided to run it on Google Compute Engine. My hobby projects are currently primarily in python and R, both of which offer web browser IDE's in the form of Jupyter Notebook and R server respectively. If those IDEs don't suffice I can use vim over ssh, or set up an ssh workspace on Cloud9. A cloud IDE offers me several advantages:
- Portability of workspace wherever I go.
- Scale development instance to the appropriate size.
- Cheaper than investing in a new, powerful laptop.
- Easy to back up through periodic snapshots.
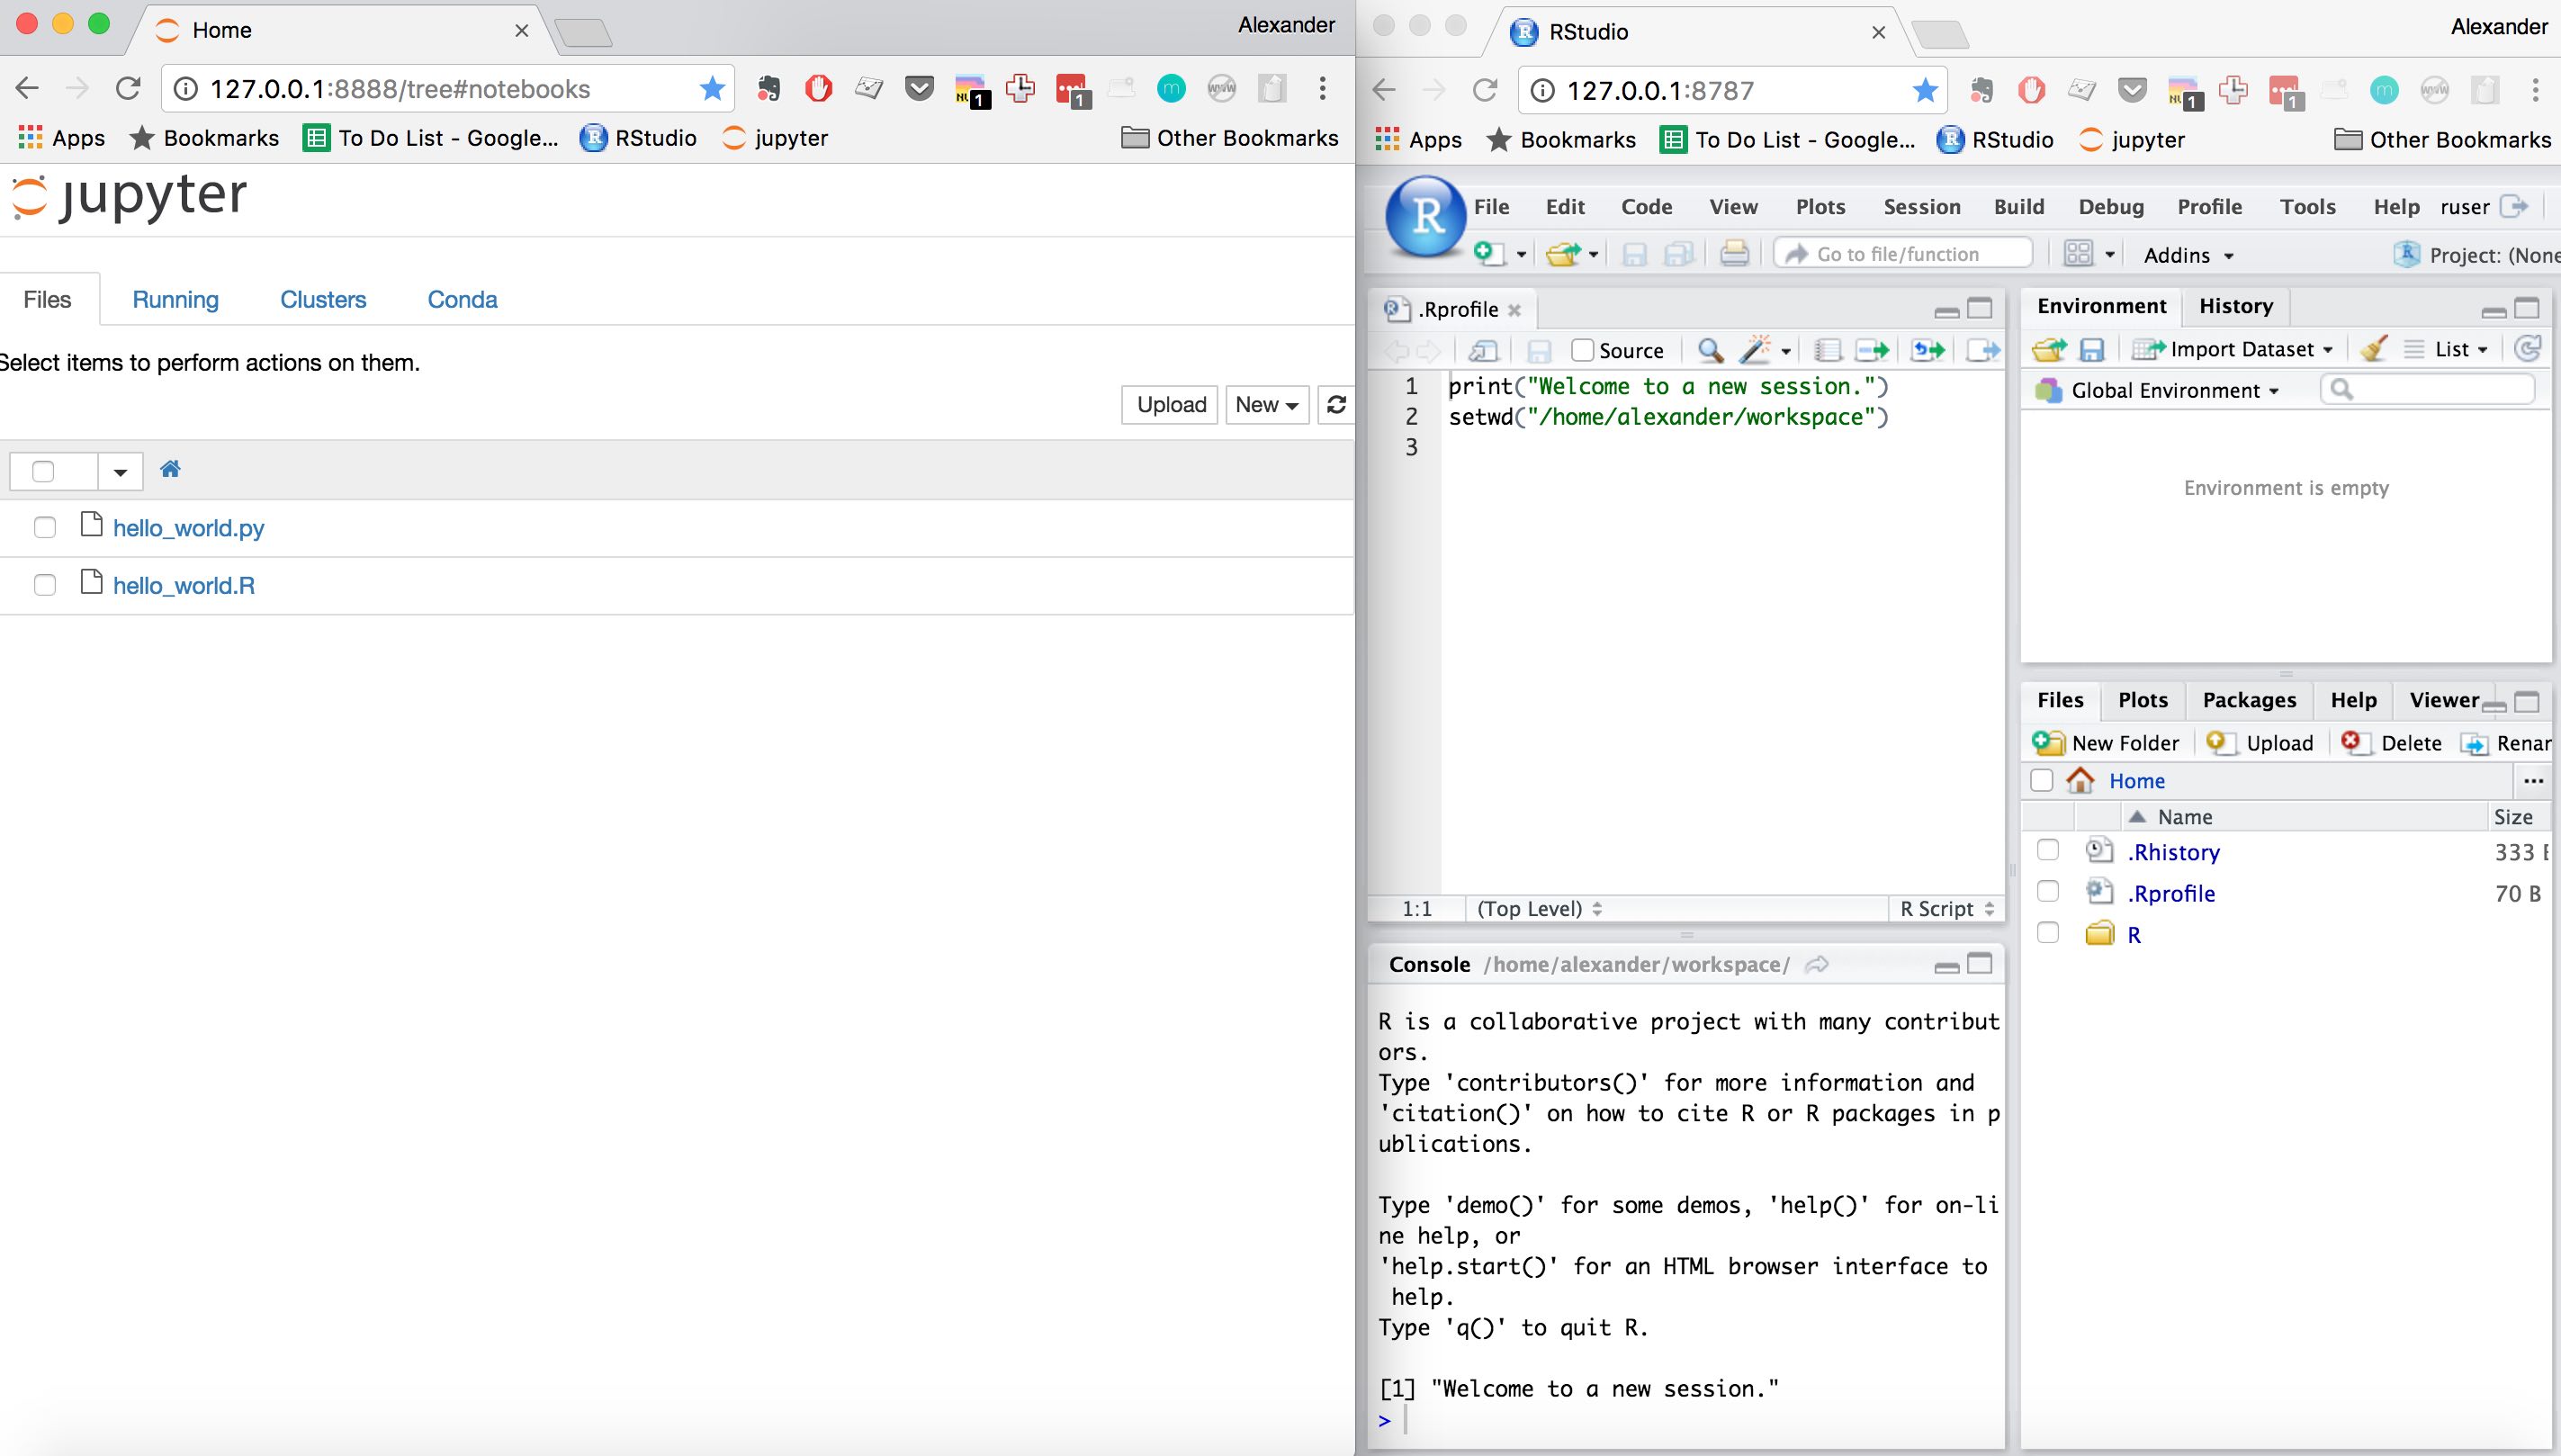
Here is what my new ide looks like :)
Setting up the Cloud instance
Set up is pretty straightforward. Follow the quickstart; here are my settings:
- Instance size: I chose the smallest to start, but you can resize at any time.
- Operating System: I chose Debian for it's stability.
- Hard disk: I highly recommend a 10Gbyte SSD drive.
- SSD for speed.
- 10Gbyte to save money. You can always make it larger later, but not smaller.
- Firewall: Allow HTTP and HTTPS connections to use
curlandwget.
Once you have the instance running, connect to it using gcloud tools.
Setting up a Jupyter Notebook
Follow the jupyter installation instructions. If you decide to install the Anaconda distribution like I did, here are a few notes:
- Copy the downloader path, and use
wgetto download the latest release. - Anaconda adds a line to your .bashrc exporting the correct path to your
distribution. Make sure it is correct (it looks like
PATH="/home/username/path/to/anaconda3/bin:$PATH") - Source you bashrc
source ~/.bashrcand ensure the latest version of conda is installed by enteringconda -V. - You can now start your jupyter notebook with
jupyter notebook --ip=0.0.0.0 --port=8888 --no-browser - To access your jupyter notebook via the browser, you'll need to forward the
8888 port to your local machine using ssh. ssh flags can be passed via
gcloud:
gcloud compute ssh --ssh-flag="-L localhost:8888:0.0.0.0:8888" instance_name - You should now be able to navigate the browser on your local machine to
http://127.0.0.1:8888/and see the jupyter interface.
Create a Jupyter Service
Wouldn't it be nice if the underlying Operating system handled starting the notebook server as well as restarting it, if it died? That's what Daemons are for. Writing a service script is actually a bit tricky, fortunately you can adapt Doowan this template.
I adapted this file in the following:
- Changed
UID=1000toUID=`id -u username`so that the daemon runs as me. - Added
"/path/to/anaconda3/bin:$PATH"to the initial variables declared so the path to the anaconda distribution is loaded. - Changed DAEMON variable to:
DAEMON=/path/to/anaconda3/bin/jupyter-notebook. - Changed the DAEMON_ARGS to:
"--ip=0.0.0.0 --port=8888 --no-browser
  --notebook-dir=/path/to/user/workspace"
.
Make sure the logging directory exists. Afterwards you can start, stop, or restart the service with:
sudo /etc/init.d/jupyter start
sudo /etc/init.d/jupyter stop
sudo /etc/init.d/jupyter restart
Furthermore, whenever you start the instance, the notebook server will already be up and running.
Setting up RStudio Server
Installing RStudio server is straightforward. The instructions below are for debian jessie, but Ubuntu is very similar. The first thing to do is add the CRAN repository. This consists of two steps:
- Add the debian cran entry to
/etc/apt/sources.list
sudo sh -c 'echo "deb http://cran.rstudio.com/bin/linux/debian jessie-cran3/" >> /etc/apt/sources.list'
- Add the correct public key to verify the packages, as described in this Stackoverflow answer
sudo apt-key adv --keyserver hkp://pgp.mit.edu:80 --recv-keys 381BA480
- Now you can follow the rest of the instructions on setting up RStudio server:
sudo apt-get install r-base
sudo apt-get install gdebi-core
wget https://download2.rstudio.org/rstudio-server-1.0.44-amd64.deb
sudo gdebi rstudio-server-1.0.44-amd64.deb
If you are using a mac, and throughout this process you are getting locale warnings like:
perl: warning: Setting locale failed.
perl: warning: Please check that your locale settings:
    LC_ALL = (unset),
    LANG = "en_US.UTF-8"
    are supported and installed on your system.
You can uncomment the line AcceptEnv LANG LC_* in /etc/ssh/sshd_config as
described in this stackoverflow answer.
Creating a User to Log Into RStudio Server
Rstudio already creates a daemon listening on port 8787 for you,You can forward
this port with gcloud compute ssh --ssh-flag="-L 8787:0.0.0.0:8787" instance_name
and navigate your browser on your local machine to http://127.0.0.1:8787/ to be greeted by RStudio's login screen prompting for a
username and password. Any user account with a password can login here.
However, the user created by the instance during setup has their password locked. You can check this
using the passwd command:
passwd --status username
username L 10/29/2016 0 99999 7 -1
The L means the password has been locked, which means no value entered will
ever hash to the password. This prevents a remote login without your private
key. You have two options:
- Unlock the account, as described in the link above.
- Create a new user
Because I didn't want to unlock an account with admin privileges, I chose option two. Once you've created the new user you'll be able to log into RStudio server at http://127.0.0.1:8787/.
Sharing a Workspace
One disadvantage of creating a separate user for RStudio Server is that your python and R workspaces will be separate. Because I wanted to be able to share data files between the two environments, I decided to make my original user's workspace part of a developers group, so the new ruser I created would have access to the workspace. To do this, first create the workspace and add the users to it:
sudo su # Become root.
groupadd developers # Create group developers.
usermod -a -G developers ruser # Add ruser to group developers.
usermod -a -G developers username # Add original user to group developers.
The next steps are as follows:
- Add your workspace directory to the developers group.
- Set the workspace's group_id so all future files will belong to the developers group.
- Set the workspace's default ACL so all current and future files will have group read write execute permission.
The commands to this are:
chgrp -R developers workspace # Recursively add dir and all files to developers
chmod g+s workspace # future files are part of developers group
setfacl -R -m g:developers:rw foo/ # current and future files have group rwX permissions
Now create an .Rprofile file in you ruser home directory and add
setwd("/home/username/workspace") to it. That's it, now whenever you login to
RStudio you'll be in the shared workspace.
Comments
comments powered by Disqus