Have you been itching to play with Spark, but been somewhat put off by the in-depth documentation? Then this guide is for you. I've been wanting to try Pyspark for some time now, and was surprised there was no 'quickstart', aka. get your first Pyspark job up and running in 5 minutes guide. So I wrote this tutorial. This guide will walk you through the process of installing Spark on a local machine and get you started writing map reduce applications.
Prerequisites: Familiarity with Python and Bash. The operating system I'm using is Ubuntu, if you are using another Linux distro, you can most likely just follow along. However, if you are using OS X some adaptation may be needed.
Note: Spark is in continuous development. The examples in this guide have been written for spark 1.5.1 built for Hadoop 2.6. As of today, spark 1.5.1 is the most recent version, but by the time you read this, it may very well be outdated. If this is the case, you can most likely follow along by replacing the version numbers with the most current version. e.g. spark-x.y.z instead of spark 1.5.1 .
Why Spark?
To me, one of the most appealing features of Spark is the ability to write map reduce jobs in Python. Until recently there weren't many alternatives to writing verbose Java programs if you wanted to write map reduce jobs. Now however, with Spark's Python api, developers can easily and rapidly prototype ideas using a language that is built on core philosophies such "Don’t try for perfection because “good enough” is often just that." and "Readability counts". This, combined with the fact that almost every programmer knows Python, makes me believe that very soon Python will be the most commonly used language for Spark applications.
Downloading Spark
First download the latest version of Spark. In the 'Choose a package type' dropdown, select the most recent 'Prebuilt for Hadoop X.Y or later' version. As of date, this is Spark release 1.5.1 and the binaries are 'Pre-built for Hadoop 2.6 or later' To verify the installation, you can run the md5sum command on it. e.g. md5sum spark-1.5.1-bin-hadoop2.6.tgz and compare the output of the hash with the signatures and checksums listed for that version on the spark homepage.
Installing Spark
We are going to install Spark into /usr/local/bin, but there are several other viable locations you could install it to.
Change to the directory where you downloaded the Spark binary, then decompress it:
sudo tar -zxf spark-1.5.1-bin-hadoop2.6.tgz -C /usr/local/bin
Let's verify that everything works so far. Change directory to /usr/local/bin, and start the pyspark shell:
cd /usr/local/bin
spark-1.5.1-bin-hadoop2.6/bin/pyspark
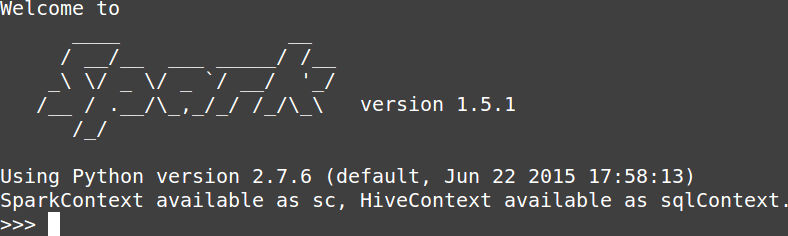
this should start up a python shell that looks like:
Configuring The PYTHONPATH
Being able to start a Pyspark shell is great, but what if you want to use ipython notebooks or write full blown Pyspark jobs? To do this you'll need to tell your interpreter where to look for the pyspark and py4j libraries. We'll accomplish that by adding the following lines to your bashrc to update the PYTHONPATH variable.
export SPARK_HOME=/usr/local/bin/spark-1.5.1-bin-hadoop2.6
export PYTHONPATH=$SPARK_HOME/python:$SPARK_HOME/python/build:$PYTHONPATH
export PYTHONPATH=$SPARK_HOME/python/lib/py4j-0.8.2.1-src.zip:$PYTHONPATH
once you've sourced your bashrc, start up a python prompt and type:
import pyspark
if this does not result in any exceptions, congratulation! You've successfully installed Pyspark. If it doesn't, double check the version numbers to make sure they are correctly specified.
Running Spark
Now that we've installed Spark, we'll look at two different modes in which you can run Pyspark code.
1. Running Pyspark In Local Mode:
The fastest way to to get your Spark code to run is to run in local mode. To do this we tell the Spark configuration to use the special 'local' mode. Open an iPython shell or an iPython notebook session and paste the following:
from pyspark import SparkContext, SparkConf
conf = SparkConf().setAppName('appName').setMaster('local')
sc = SparkContext(conf=conf)
data = range(10)
dist_data = sc.parallelize(data)
print dist_data.reduce(lambda a, b: a+b)
2. Run Spark In Standalone Mode:
The disadvantage of running in local mode is that the SparkContext runs applications locally on a single core. The easiest way to use multiple cores, or to connect to a non-local cluster is to use a standalone Spark cluster. An additional benefit to running Spark in standalone mode is the master exposes a UI (by default at http://localhost:8080/ )that allows us to monitor our Spark jobs. I'll show you how to set up a standalone Spark cluster on your local machine. For more information, check out the official documentation.
A standalone Spark cluster consists of one master and several slaves that are connected to it. The slaves as well as the master can all be running on the same machine, or they can be distributed across multiple machines.
To launch the master, navigate to /usr/local/bin and execute:
sudo ./spark-1.5.1-bin-hadoop2.6/sbin/start-master.sh
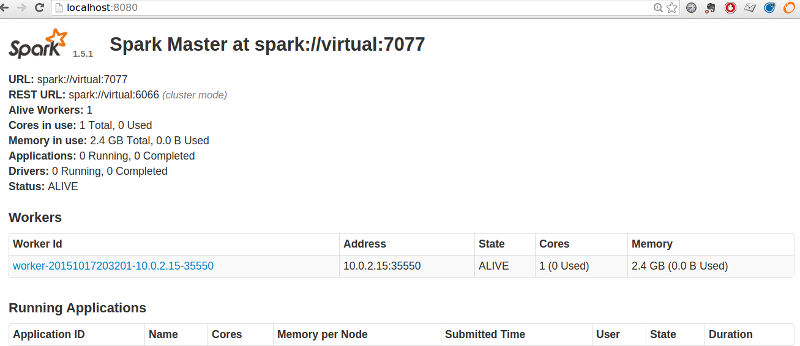
Once the master is up and running, you can use your browser to navigate to http://localhost:8080/. You should see the url where the master is listening. E.g. spark://virtual:7077
You can launch and connect a slave with this url:
sudo spark-1.5.1-bin-hadoop2.6/sbin/start-slave.sh spark://virtual:7077
Once your slaves have started up, you can navigate to http://localhost:8080/ again. This time, you will see the connected workers:
Now that your cluster is up and running, you can submit jobs to it. To submit a job from within your Python code, specify the master parameter as the url where the master is listening:
from pyspark import SparkContext, SparkConf
conf = SparkConf().setAppName('appName').setMaster('spark://virtual:7077')
sc = SparkContext(conf=conf)
data = range(10)
dist_data = sc.parallelize(data)
print dist_data.reduce(lambda a, b: a+b)
Pitfall: The master processes tasks sequentially. If a task never ends (e.g. because it's a shell) you will not be able to submit another job. It's easiest if you only connect one Python shell / notebook to your cluster.
To gracefully shut down your Spark cluster execute the stop-all.sh script from the sbin directory. E.g.
sudo spark-1.5.1-bin-hadoop2.6/sbin/stop-all.sh
Set Aliases
You may want to make starting and stopping the Spark cluster more convenient. This can be done by setting several aliases. For example, adding the following lines to your bashrc:
alias sparkmaster-start='sudo /usr/local/bin/spark-1.5.1-bin-hadoop2.6/sbin/start-master.sh'
alias sparkslave-start='sudo /usr/local/bin/spark-1.5.1-bin-hadoop2.6/sbin/start-slave.sh spark://virtual:7077'
alias sparkmaster-stop='sudo /usr/local/bin/spark-1.5.1-bin-hadoop2.6/sbin/stop-master.sh'
alias sparkslave-stop='sudo /usr/local/bin/spark-1.5.1-bin-hadoop2.6/sbin/stop-slave.sh'
will define four aliases:
sparkmaster-startsparkslave-startsparkmaster-stopsparkslave-stop
You can then start a spark cluster with:
sparkmaster-start
sparkslave-start
and shut it down with:
sparkmaster-stop
sparkslave-stop
Comments
comments powered by Disqus